
This post is a part of Azure Spring Clean which is a community event focused on Azure management topics from March 22-25, 2021. Many thanks to Joe Carlyle and Thomas Thornton for organizing this event and allowing me to contribute. In this blog post, I will share how you can manage your Azure spend using Azure Cost Management.
Cost is always a critical factor in your organization’s success in all areas including the public cloud. Microsoft Azure (like any other public cloud provider / hyper-scaler) works on the principle of utility computing. Consuming Azure services requires a shift in the mindset from CapEx (Capital Expense) model to OpEx (Operating Expense) model. Meaning, unlike traditional on-premises infrastructure (where you can pay upfront to procure hardware and supporting infrastructure, and claim the cost as a tax deduction), you don’t pay any upfront cost for consuming Azure services and you pay based on your usage on a monthly basis.
As a starting point, before you deploy any resources in Azure, it is important to estimate the costs. Azure Pricing Calculator and Azure TCO Calculator are two great resources to help you with that. In Azure Pricing Calculator, you can generate your estimates with the right set of resources that you wish to provision.
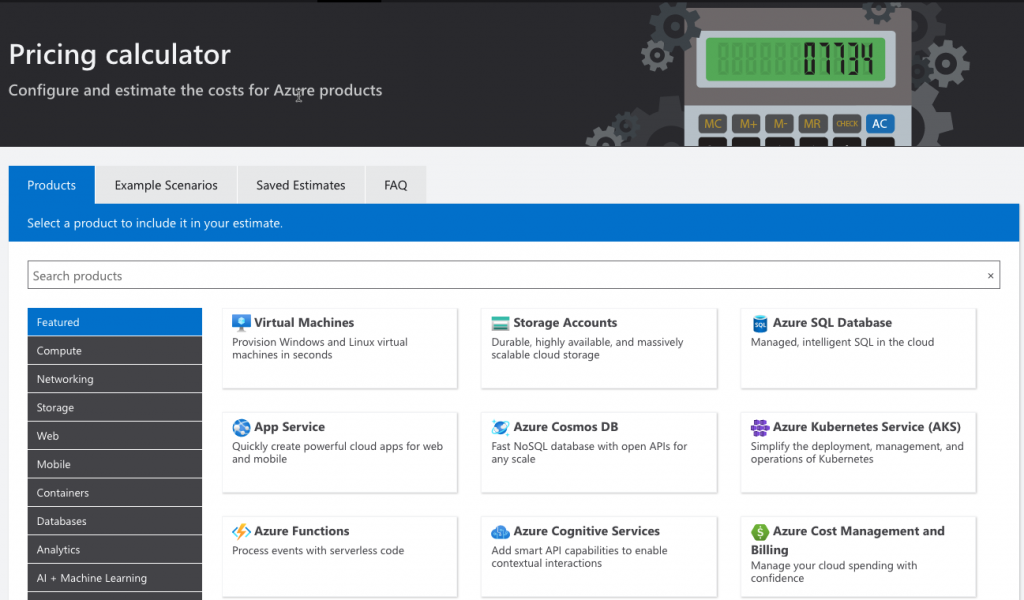
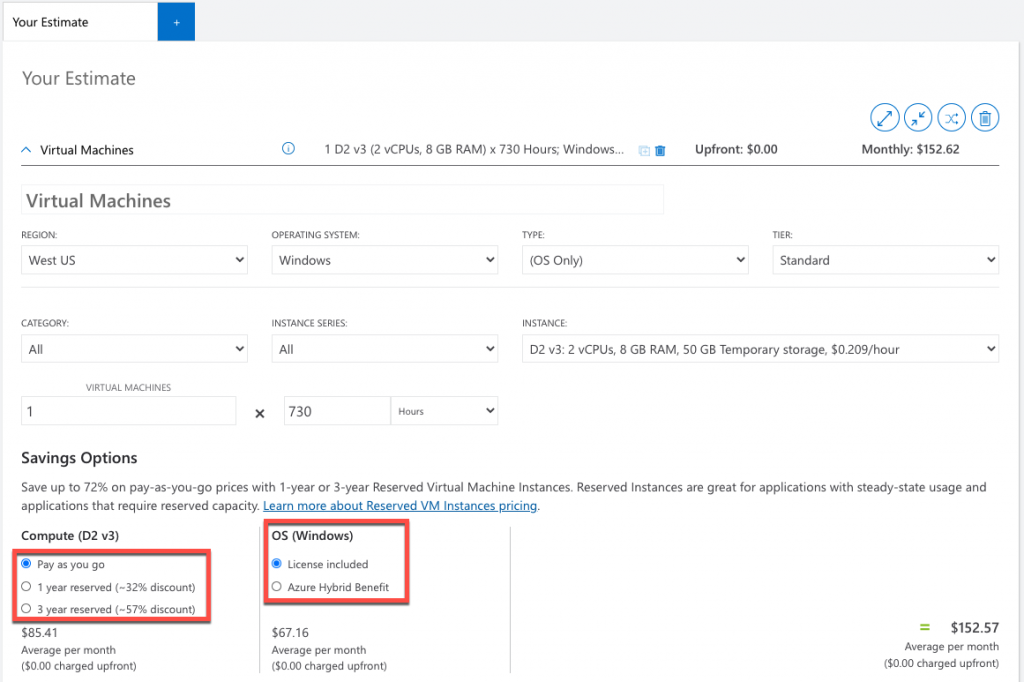
You can also verify different discounts available to you to bring down your costs, like reservations and Azure Hybrid Benefit. Sometimes, the pricing for a service can vary based on the selected region and other options. Be cognizant of your requirements and choose the right pricing tier that meets your needs.
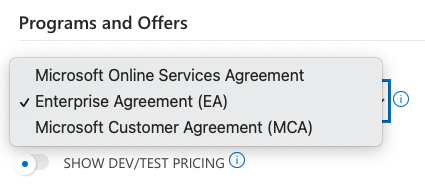
If you have an enterprise agreement or a Microsoft Customer Agreement with Microsoft, you can verify the total cost after your discount is applied as well. Likewise, you can also see the dev/test pricing to validate additional savings.
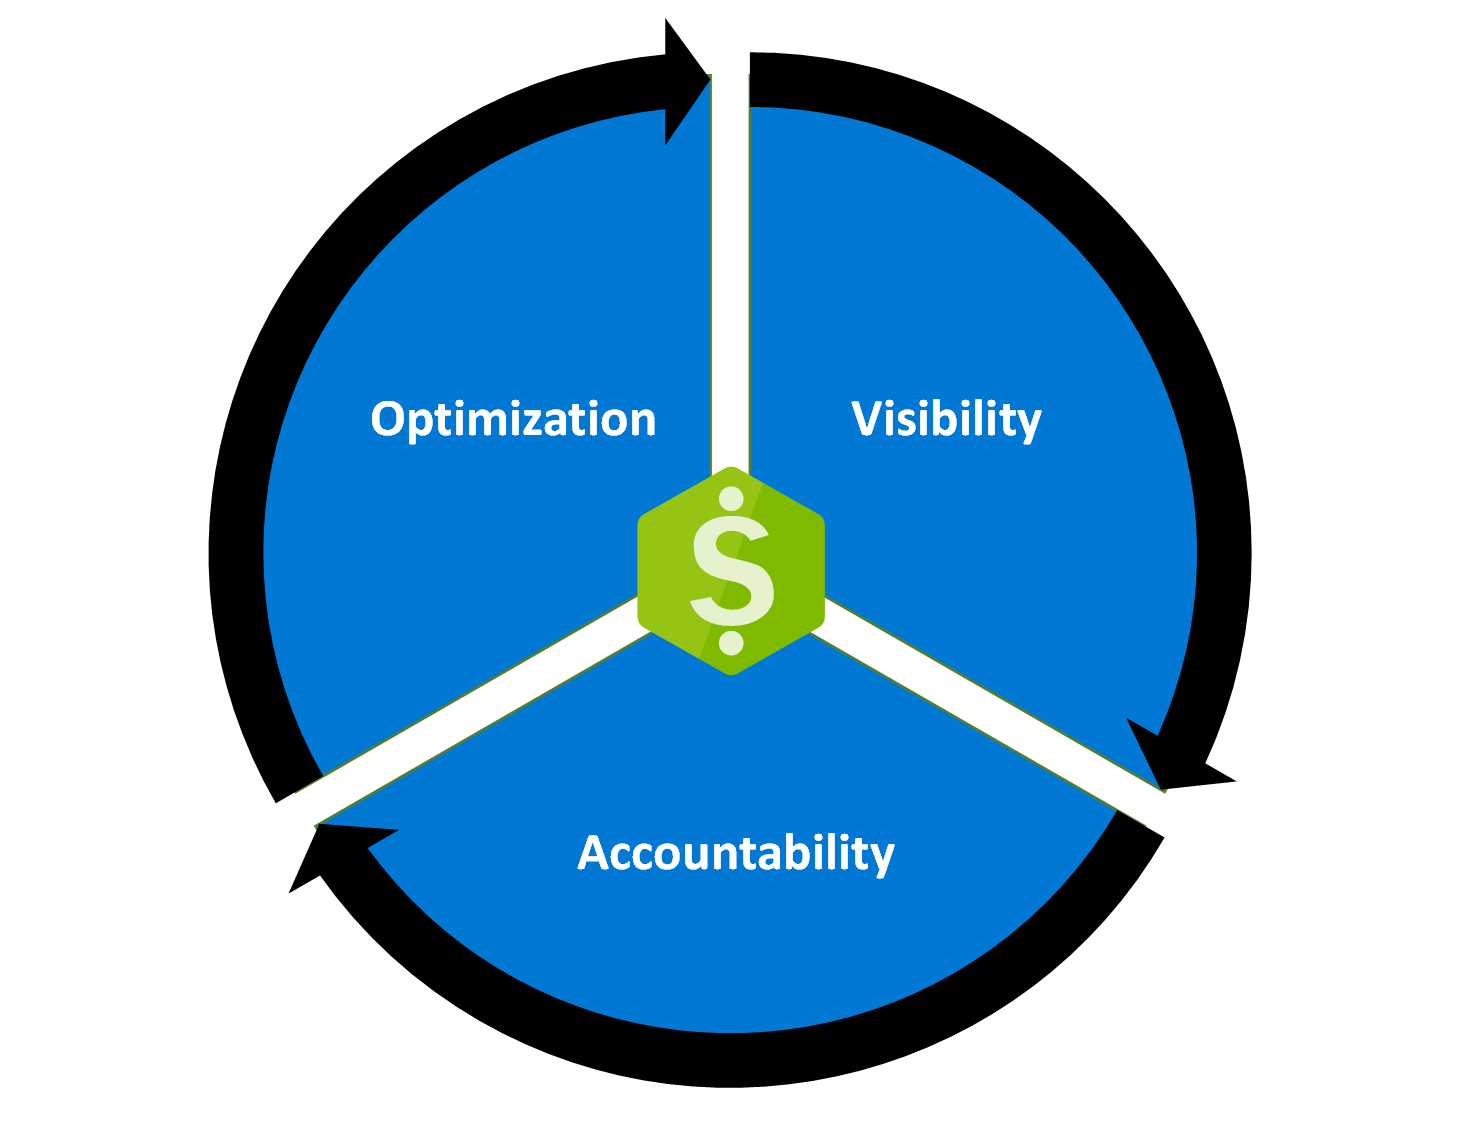
Once you have estimated your costs and provisioned your Azure resources, it is very important to keep a track of your Azure spend and optimize it regularly by minimizing wastage. Microsoft offers a feature-rich tool called Azure Cost Management and Billing for managing your Azure spend. It helps to bring visibility into your Azure spend by providing insights into where your money is spent. You can utilize tags and cost attribution features in Azure Cost Management to attribute your Azure costs to different people and departments to bring in accountability. Once you gain visibility and accountability into your azure spend, you can utilize the insights to optimize your workloads by minimizing wasteful expenses and reduce your overall spending. You can utilize options like reservations and Hybrid Benefit to bring down your overall spend. You can also refer to Azure Advisor which offers a bunch of recommendations to optimize your Azure spend.
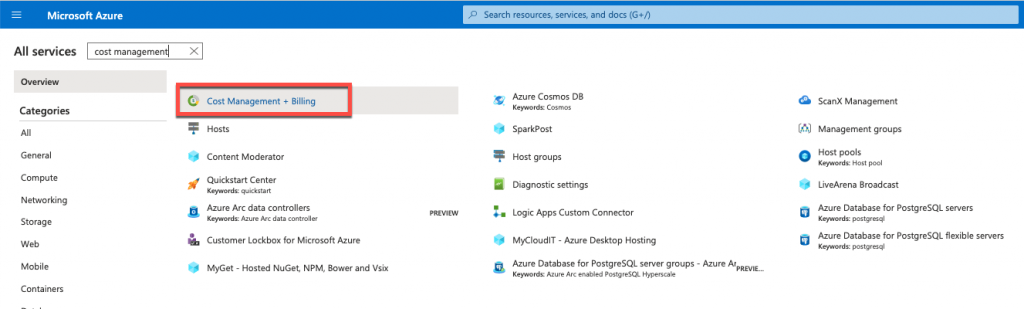
Getting Started with Azure Cost Management: To get started with Azure Cost Management, Login into Azure Portal, then go to All Services and search for cost management.
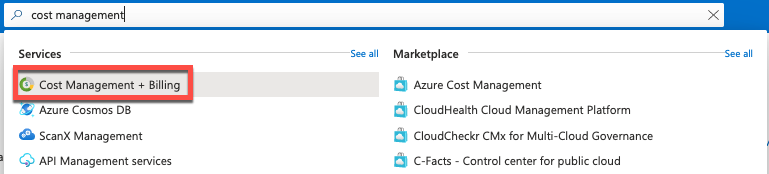
Alternatively, you can also search for Cost Management in the top search bar –
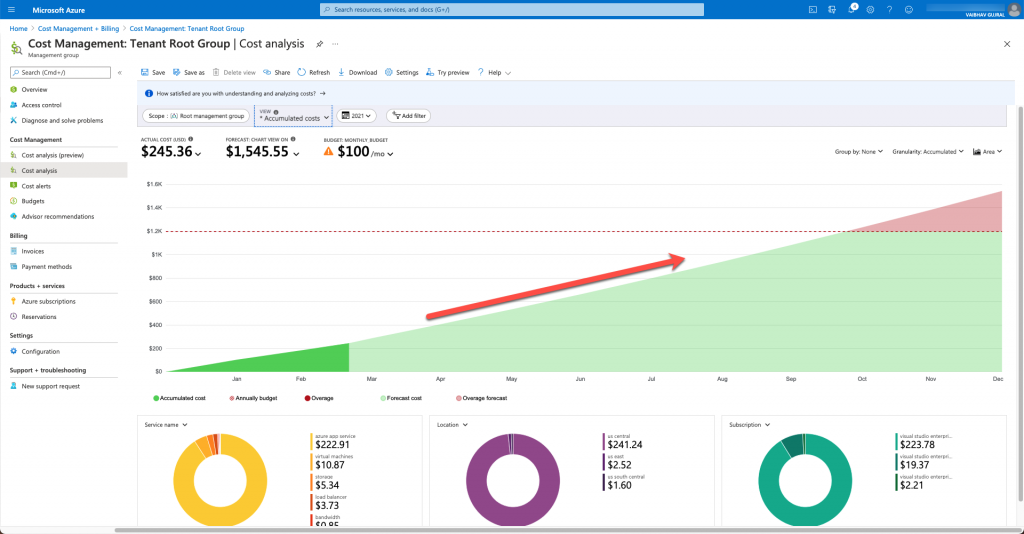
Cost Analysis: Azure Cost Management just not let you see your historical cost data, but it also offers forecasted costs for up to 12 months.
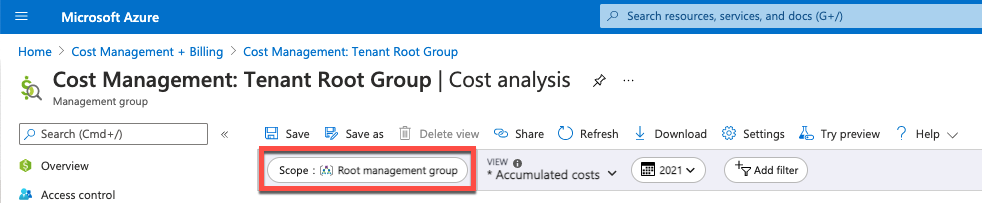
Billing Scope: To start with Azure Cost Management, choose the right billing scope you have access to. For example – if you have access to a resource group, you can manage costs for that resource group. Likewise, if you have access to a subscription, you can manage costs for that subscription.
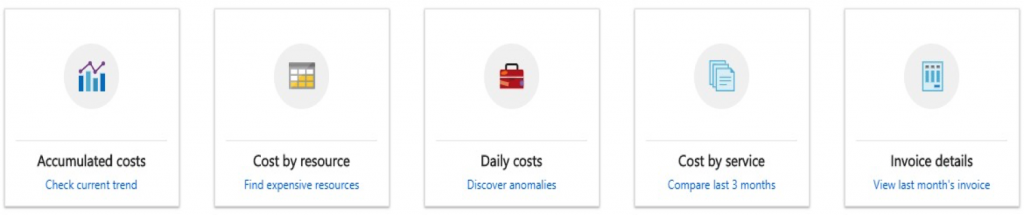
Views: Once you have selected the scope, Azure Cost Management offers a bunch of grouping and filtering options that you can utilize to generate different types of cost reports. There are 5 built-in views that you can use from –
- Accumulated Costs lets you look at current trend of your spending.
- Cost by resource shows your Azure costs grouped by each resource. This view is useful to identify expensive resources.
- Daily Costs shows the costs on a daily basis which can be useful to identify anomalies in your spending.
- Costs by Service lets you compare your azure costs grouped by service type for the last 3 months.
- Invoice details let you view last month’s invoice data.
If the built-in views don’t provide what you need, you can always create your own views.
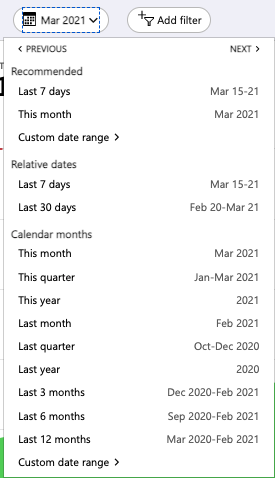
Time Filters: You can choose the timeframe for which you want to manage costs. There are predefined options that you can opt from like the last 7 days, last month, last 3 months, last year, etc. or you can select a custom date range.
Filters: You can filter your cost data based on common properties like meter category, subscriptions, resource groups, resources, resource types, tags, and so on.

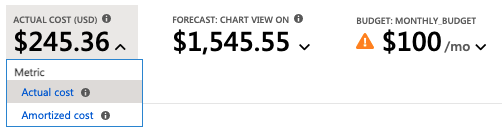
Cost View Customization: You can customize your views to see actual or amortized costs, show/hide forecasted costs, and validate your spending against budgets. By default, it shows the actual costs which reconcile with your invoice amount. you can switch to Amortized costs to show the reservation utilization and break up of reservation costs among different resources. If there is no existing budget, you can create your own budget on Actual or Forecasted costs for any billing scope in monthly, quarterly, or yearly cycles. Please check out the quick start video included in this blog post to see how to create a new budget.
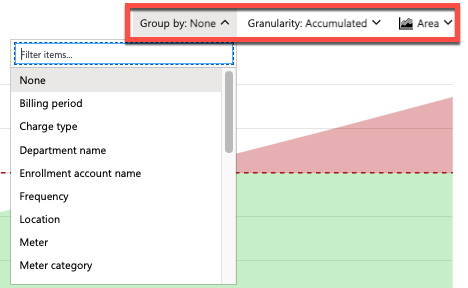
Grouping and Charting: Lastly, you can group your cost data based on common properties like meter category, resource group name, subscription, and tags. You can also generate different kinds of charts (area, line, or column) to show trends for your Azure cost data. You can also show the cost data in table format.
Tags: Azure offers a mechanism called tags through which you can group your resources into a taxonomy. Tags can be very helpful in grouping spend of related resources in Azure Cost Management. For example- you can tag all your resources with an Owner and an Application tag to which the resources belong to. Then, in Azure Cost Management, you can filter or group Azure Cost data based on the owner and/or application tags to attribute the Azure costs correctly. As a best practice, you can also enforce certain tags in your environment using Azure Policies. For more details on Azure Tagging policies, please refer to this link.
Supported Account Types: Azure cost Management supports most of the common account types like Enterprise Agreement and Microsoft Customer Agreement. Please click here to see an up-to-date list of account types supported by Azure Cost Management + billing.
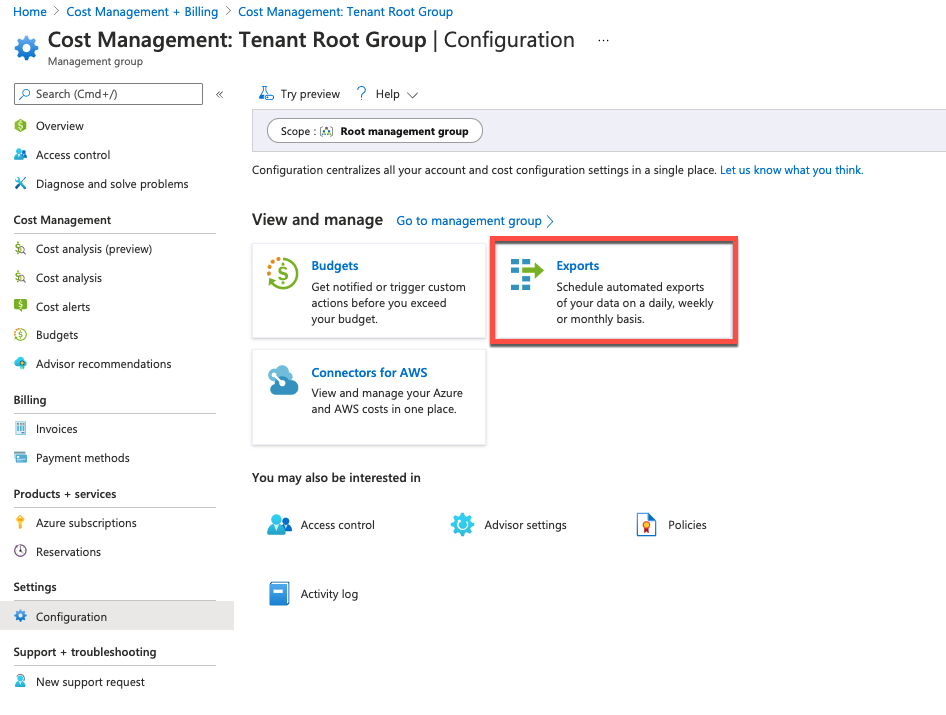
Export Azure Cost Data: You can export Azure cost data into a storage account on a schedule through the export option under the configuration blade. Alternatively, Microsoft also offers Cost Management + Billing APIs which can be used to consume the Azure cost data over APIs. If you use Power BI, you can also use Power BI Connector for Azure Cost Management.
Manage AWS costs: If you have multi-cloud environments, you can use Azure Cost Management to just not manage your Azure costs, but, also, your AWS costs. To get started with the integration, please visit this link.
Pricing: Azure Cost Management is free to use to manage Azure costs, but, if you would like to manage your AWS spend, it comes with a price tag. For detailed and up-to-date pricing, please visit this link.
Quick Start Video: Here is a quick start video where I have demonstrated how to get started with Azure Cost Management –
Seven ways to optimize Azure costs: Here are seven easy ways to optimize your Azure spend:
- Shut down unused resources – Since the cloud works on a Pay-As-You-Go model, don’t leave any resources running in Azure that are not used.
- Right-size under-used resources – Don’t over-provision your resources. Start small and provision the minimum capacity that you need. Increase the capacity when needed.
- Reserve instances for consistent workloads – if you are an enterprise customer, you can save up to 72% by buying capacity upfront.
- Take advantage of the Azure Hybrid Benefit – if you have licenses bought for your on-premises infrastructure, you can bring them to your cloud resources to further optimize your spending.
- Configure autoscaling – Similar to right-sizing, you can auto-scale your resources when needed.
- Set up budgets and allocate costs to teams and projects – Budgets help keeping a track of your Azure spend.
- Choose the right Azure compute service – You can be better off by buying a single Azure SQL database instead of provisioning a full-blown Virtual Machine.
Here are some resources you can refer to for more details:
- https://docs.microsoft.com/en-us/azure/cost-management-billing/cost-management-billing-overview
- https://docs.microsoft.com/en-us/azure/cost-management-billing/costs/understand-cost-mgt-data
- https://azure.microsoft.com/en-us/overview/cost-optimization/#ways-to-optimize
- https://www.youtube.com/watch?v=dVuwITdSAZ4
Thank you so much for taking the time to read my blog. I hope you would have found this post helpful. If you have liked my blog post and you have not subscribed to my blog already, I would encourage you to do it so that you are notified every time I publish new content. You can also subscribe to my YouTube channel here to get notified whenever I publish a new video.
In case you have any questions or comments or if you need to reach out to me for anything else, feel free to contact me through this blog or through Twitter / LinkedIn.
I wish you very good health! Stay safe!